

Care & Removal
How to Fix Peeling Wallpaper and Lifted Seams
Don't let peeling corners or lifting seams spoil your walls. Our guide provides simple, effective steps to repair common wallpaper issues and restore a smooth, professional finish.

The short version
- Identify the cause. Peeling is often due to humidity, poor wall preparation, or insufficient adhesive during installation.
- Use the right adhesive. Always use a dedicated wallpaper seam adhesive or border repair glue for the strongest, most invisible bond.
- Clean before you glue. Gently clean the wall and the back of the peeling paper with a dry cloth to remove dust and debris before applying new adhesive.
- Smooth it out. Use a seam roller or a smoothing tool to press the repaired section firmly back into place, ensuring good contact and no air bubbles.
- Wipe away excess glue immediately. Use a clean, damp sponge to gently remove any adhesive that squeezes out to prevent staining or a shiny finish on the paper.
To fix peeling wallpaper, gently lift the loose section, clean any dust from the wall and the back of the paper, and apply a thin layer of wallpaper seam adhesive. Press the paper firmly back onto the wall, smooth it from the centre outwards, and wipe away any excess glue with a damp sponge for a clean finish.
What causes wallpaper to peel?
Wallpaper typically peels due to environmental factors, improper installation, or the age of the adhesive. Understanding the root cause is the first step towards a lasting repair and preventing future issues.
High humidity is a primary culprit, especially in bathrooms and kitchens. Moisture can get behind the paper and weaken the adhesive, causing it to lose its grip. This is why choosing the right paper type for the room is essential. Casavono's Pre-Pasted material, for example, is designed to suit rooms with everyday humidity.
Poor wall preparation is another common reason. If the wall was not properly cleaned, primed, or was still curing from a fresh coat of paint, the adhesive may not have bonded correctly. Dust, grease, or flaking paint create a weak surface that prevents a strong bond. Over time, the original adhesive can also simply dry out and fail, particularly in very dry climates or areas exposed to direct sunlight.
What tools and materials do I need to repair wallpaper?
For a professional-looking repair, you only need a few specific tools and materials. Having the right items on hand before you start makes the process quick and clean, ensuring the fix is nearly invisible.
Your essential kit should include:
- Wallpaper Seam Adhesive: A small tube of specialised adhesive is crucial. It is formulated to be strong but not so wet that it soaks through the paper.
- Small Artist's Brush: This allows you to apply the adhesive precisely to the back of the wallpaper without making a mess.
- Seam Roller: A small, hard roller designed to apply firm, even pressure along a seam or edge to ensure a strong bond.
- Smoothing Tool: A flexible plastic smoother helps press the paper flat and work out any air bubbles without damaging the surface.
- Utility Knife: You will only need this for more complex repairs like bubbles or tears. Ensure you have a fresh blade.
- Damp Sponge and Dry Cloth: These are essential for cleaning up any excess adhesive immediately. You can find more tips in our guide on how to clean wallpaper glue.
Murals made to your measure
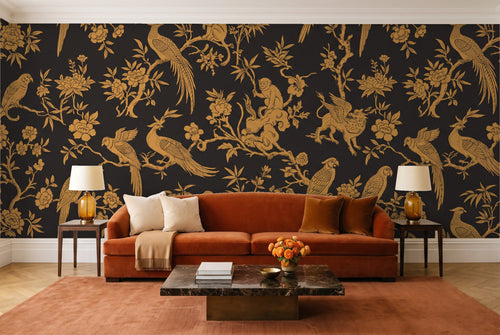
 Kinabalu, FernPrinted to your wall size
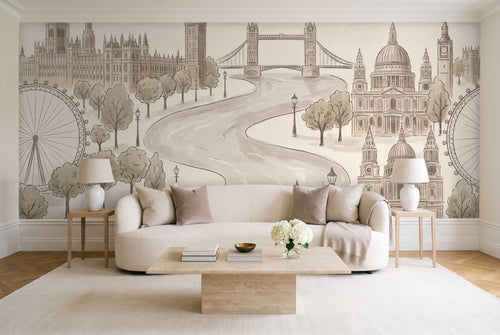
 Holkham, OatPrinted to your wall size
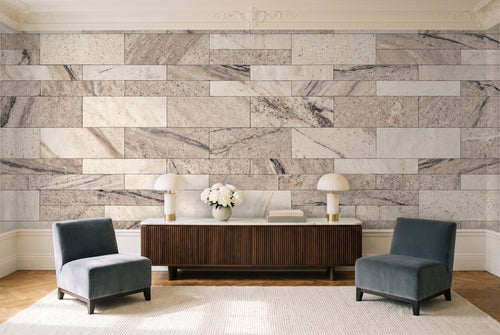
 Aldworth, MossPrinted to your wall size
How do you fix peeling wallpaper corners and edges?
Fixing a peeling corner or edge is the most common wallpaper repair and can be done in just a few minutes. The key is to be gentle with the paper and methodical in your application of the new adhesive.
Follow these simple steps for a perfect finish:
- Prepare the Area: Gently lift the peeling corner or edge away from the wall. Be careful not to bend or crease the paper. Use a dry cloth or soft brush to remove any loose dust, debris, or old, flaky adhesive from both the wall and the back of the wallpaper.
- Apply Adhesive: Squeeze a small amount of wallpaper seam adhesive onto a piece of scrap card. Dip your small artist's brush into the glue and apply a thin, even coat to the back of the wallpaper section. Focus on covering the entire loose area right to the edges.
- Press and Smooth: Carefully press the glued paper back onto the wall. Use a clean, damp sponge or a flexible smoothing tool to smooth the paper down, working from the bonded section outwards towards the corner or edge. This pushes out any trapped air.
- Secure the Bond: Once smoothed, use a seam roller to apply firm pressure along the repaired edge. Roll back and forth a few times to ensure the adhesive makes full contact. This step is vital for a durable, flat finish on any design, from a simple texture to a scenic mural like the Wetherby, Linen.
- Clean Up: Immediately wipe away any small beads of adhesive that may have squeezed out using your damp sponge. Check the area from a few angles to ensure no residue is left behind, as it can dry to a shiny finish.
How do you fix wallpaper seams that are lifting?
Lifted seams occur when the edges of two wallpaper panels pull away from each other and the wall. This issue requires a careful hand to avoid getting adhesive on the front of the paper, but the process is very similar to fixing a peeling corner.
Here is how to repair wallpaper seams for a discreet result:
- Gently Clean the Seam: Carefully pull the lifted edges apart just enough to access the space behind them. Use a dry cloth to wipe away any dust from the wall surface and the back of the paper. If there is a lot of old, crumbly paste, you can use the tip of a utility knife to gently scrape it away.
- Apply Adhesive Sparingly: Using your small artist's brush, apply a thin layer of seam adhesive to the back of both edges of the wallpaper. Avoid over-applying, as too much glue can saturate the paper or squeeze out excessively.
- Rejoin the Seam: Press both edges back down onto the wall, carefully aligning them so they meet perfectly without overlapping. Good installation is key; Casavono murals are designed with panels that are hung edge to edge, which helps create a continuous image with tight seams from the start.
- Smooth and Roll: Run a smoothing tool over the seam to bed the paper into the adhesive. Immediately follow up with a seam roller, applying firm pressure directly along the join. This is the most important step for making the seam flat and secure.
- Final Wipe Down: Use a clean, damp sponge to gently wipe along the seam, removing any traces of adhesive. Pat the area dry with a soft, clean cloth. Allow the repair to dry completely, which usually takes a few hours.
Ready for a Flawless New Look?
Explore our collection of made to measure murals, printed to your exact wall size for a perfect fit.
Can you repair a bubble or blister in wallpaper?
Yes, you can easily repair bubbles and blisters. These typically form for two reasons: trapped air during installation, or a spot of moisture or dust on the wall that prevented the adhesive from sticking. The repair method depends on whether the bubble feels soft (air) or is the result of a damp patch.
For small, dry bubbles of trapped air, a sharp blade is the best solution. For larger bubbles or those caused by adhesive failure, a syringe is more effective. This allows you to inject glue without creating a large opening in the paper.
| Technique | Best For | How It Works |
|---|---|---|
| Syringe Method | Larger bubbles or areas where adhesive has failed. This works well for both Pre-Pasted and Non-Pasted papers. | Inject adhesive directly into the bubble. Fill a craft syringe with seam adhesive, pierce the centre of the bubble, inject a small amount, then smooth the paper flat. |
| Incision Method | Small, dry bubbles of trapped air. This is a quick fix for bubbles that appeared soon after hanging. | Release the trapped air through a small cut. Use a fresh utility knife blade to make a tiny X-shaped cut in the bubble, then gently press the air out. |
After using either method, carefully press the paper flat with a smoothing tool, working from the outside of the bubble towards the centre or incision. Use a damp sponge to wipe away any adhesive that seeps out and then use a seam roller to flatten the area completely.
How do you repair a tear or gouge in wallpaper?
Repairing a tear or a small hole is more complex than fixing a seam, as it often involves a patch. The goal is to make the repair as invisible as possible by perfectly aligning the pattern. This is where having a spare piece of wallpaper becomes invaluable.
For a simple flap or tear:
If the paper is torn but the piece is still attached, you can often glue it back down. Gently lift the flap, apply a small amount of seam adhesive to the back with a fine brush, and press it back into place. Smooth it down and clean any excess glue. This works best for minor damage.
For a gouge or missing piece:
This requires a patch. The best technique for a seamless result is the double-cut method.
- Cut a Patch: Take your spare wallpaper piece and place it over the damaged area. Carefully move it around until the pattern aligns perfectly with the wallpaper on the wall. Temporarily fix it in place with a small piece of low-tack painter's tape.
- Perform the Double Cut: Using a very sharp utility knife and a straight edge, cut a square or rectangular shape through both layers of paper (the patch and the damaged paper on the wall). Ensure your shape is larger than the damaged spot.
- Replace the Section: Remove the painter's tape and the excess patch material. Then, gently peel away the cut, damaged section from the wall. You should be left with a perfectly shaped hole. Apply wallpaper paste to the back of your new patch and fit it into the opening.
- Finish the Repair: Smooth the patch into place and use a seam roller around its edges to bed it in. Wipe away any excess paste. When done correctly, the pattern will match perfectly and the repair will be very difficult to spot, especially on a detailed design like the floral Evesham, Claret or the damask Ravenna, Onyx.
Always use a fresh blade. A dull utility knife blade will drag and tear the wallpaper, resulting in a fuzzy, noticeable edge. For the cleanest possible cut when patching, snap off the old segment and use a brand new tip.
When is it better to replace wallpaper instead of repairing it?
While most minor issues can be repaired, there comes a point where replacing the wallpaper is a more practical and effective solution. It is time to consider a fresh start if the damage is extensive, the paper is very old, or the underlying wall has problems.
Consider replacing your wallpaper if you notice:
- Widespread Peeling: If multiple seams are lifting or large sections are peeling away, it suggests systemic adhesive failure.
- Stains or Discolouration: Water stains, mould, mildew, or significant yellowing due to age cannot be repaired. These issues often point to deeper problems with the wall itself.
- Multiple Tears and Gouges: A wall with numerous patches can end up looking more obvious than the original damage.
- Outdated Style: Sometimes, the simplest reason is the best one. If you no longer love the design, a repair might not be worth the effort.
A fresh start. Starting over with a new wall mural allows you to ensure the wall is perfectly prepared for a long-lasting finish. Opting for a made to measure mural, such as the serene Aldworth, Moss, means the design is printed to your wall's exact width and height.
This ensures a perfect fit. You can use our free wallpaper calculator to help with your measurements. If you are considering covering the old paper, first read our expert advice on whether you can paint over wallpaper.
How can I prevent wallpaper from peeling in the future?
Preventing wallpaper from peeling comes down to two key factors: meticulous wall preparation and correct installation technique. Getting these right from the start is the best way to ensure your wallpaper stays firmly in place.
Proper wall preparation is non-negotiable. The wall must be smooth, clean, dry, and structurally sound. This means filling and sanding any holes or cracks, cleaning off any dust or grease, and removing any flaking paint. For a full checklist, consult our detailed guide on how to prepare a wall for wallpaper.
Use the right primer. Applying a wallpaper-specific primer or sealer before installation creates an ideal surface for the adhesive to bond to. It also makes future removal much easier. Freshly painted walls need to cure for three to four weeks before wallpaper can be applied.
Follow the installation instructions precisely. Different types of wallpaper require different methods. Whether you choose a traditional Non-Pasted paper (where you paste the wall), a water-activated Pre-Pasted paper, or a convenient Peel & Stick option, adhering to the specific hanging instructions is vital. Our complete installation guide provides step-by-step details for all Casavono paper types.
More murals to consider
 Ravenna, OnyxPrinted to your wall size
 Evesham, ClaretPrinted to your wall size
 Wetherby, LinenPrinted to your wall size
Common questions
Can I use any glue to fix peeling wallpaper?
No, you should not use household glues like PVA or superglue. These can stain, soak through the paper, or create a brittle bond that cracks over time. Always use a dedicated wallpaper seam adhesive, which is formulated to be strong, flexible, and non-staining for a professional, invisible repair.
How long does a wallpaper repair take to dry?
A small repair using seam adhesive will typically be touch-dry within an hour, but it is best to leave it to cure fully for at least 12 to 24 hours. During this time, avoid touching the area and ensure the room has good air circulation but no direct drafts hitting the repair.
What if the wallpaper pattern does not match after a repair?
If a patch is misaligned, the best option is to remove it carefully while the adhesive is still wet and try again. If it has already dried, the repair will be noticeable. This highlights the importance of taking your time to align the pattern perfectly before making any cuts for a patch.
Do I need to clean the wall before repairing wallpaper?
Yes, cleaning is a crucial step. Gently wipe the exposed wall and the back of the peeling wallpaper with a dry, soft cloth. This removes dust and debris that could prevent the new adhesive from forming a strong bond. A clean surface ensures a durable and long-lasting repair.
Is it harder to repair textured wallpaper?
It can be slightly more challenging. The main difficulty is that any squeezed-out adhesive can be harder to clean from the crevices of the texture. Use adhesive sparingly and wipe away any excess immediately with a damp sponge, dabbing gently rather than rubbing to protect the textured surface.
Why are my wallpaper seams showing?
Seams can become visible if the paper shrinks as it dries, which can happen if it was over-soaked or stretched during hanging. They can also appear if not enough adhesive was used at the edges or if the wall colour behind is much darker or lighter, showing through any tiny gaps.
Made to your measure
Murals for the wall you have in mind


Before you order