

Care & Removal
How to Get Wallpaper Paste Off the Wall: A Simple Guide
Removing stubborn wallpaper paste is the final step to a perfectly prepared wall. Our guide details simple, effective methods using household items or commercial removers for a smooth, paint-ready surface.

The short version
- Identify leftover paste by looking for shiny or slimy patches on the wall when wiped with a damp sponge.
- Start with the simplest method: use a sponge or spray bottle with warm water to soften the glue.
- For stubborn paste, add a small amount of washing up liquid or white vinegar to your warm water.
- Gently scrape the softened paste with a plastic scraper or putty knife to avoid gouging the wall surface.
- Always finish by rinsing the wall with a clean sponge and fresh water, then allow it to dry completely.
To get wallpaper paste off the wall, start by washing it with a sponge and warm water. For stubborn residue, add washing up liquid or white vinegar to the water, let it soak for a few minutes, and then gently scrape it away with a plastic scraper. Finish by rinsing with clean water and allowing the wall to dry fully.
Why is it important to remove all wallpaper paste?
Leaving old wallpaper paste on your walls is a recipe for a flawed finish. Whether you plan to paint or hang a new wall mural, any remaining residue will create problems. The old adhesive can prevent new paint from bonding properly, leading to cracking, bubbling, or peeling over time.
For new wallpaper, leftover paste creates an uneven surface that can show through the new paper. More importantly, it can compromise the new adhesive, causing seams to lift or panels to fail. Achieving a professional look for a large, continuous image like a wall mural depends entirely on a perfectly smooth and prepared base, a process we detail in our guide to wall preparation.
How do you know if there is still wallpaper paste on the walls?
After you have stripped the old paper, the remaining paste might not be obvious. It often dries to a thin, clear, or slightly yellowish film that you can easily miss. Look at the wall from a sharp angle with good lighting; you may spot shiny or textured patches that are different from the main wall surface.
When checking visually, dim the main lights and shine a torch or a work light at a low angle across the wall's surface. This technique, known as 'raking light', will cast shadows that exaggerate any surface imperfections.
Look for subtle differences in sheen, where some areas appear slightly glossier than the flat, matte finish of a bare wall. You might also see a faint, map-like pattern of shiny residue where the edges of the old wallpaper strips used to be.
The wet sponge test. This is the most reliable way to check for residue. Take a clean sponge with warm water and wipe a small, discreet section of the wall. Wait for a short while. If the area feels slimy, sticky, or slippery to the touch, you have wallpaper paste that needs to be removed.
Murals made to your measure
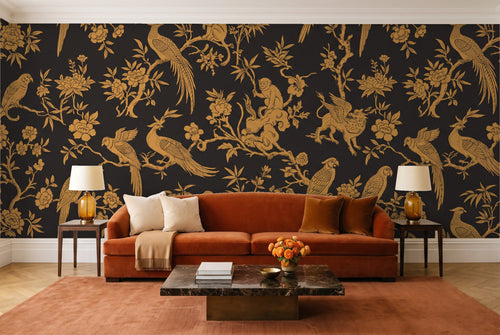
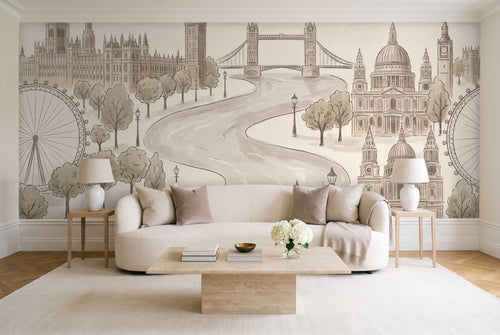
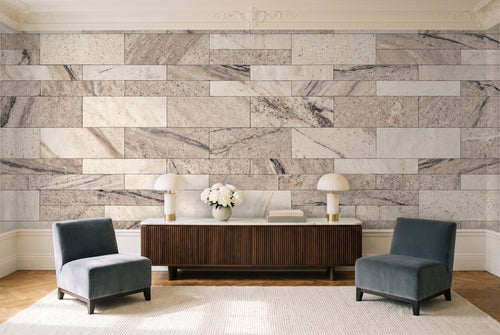
 Miyabi, LinenPrinted to your wall size
 Kinshasa, TerracottaPrinted to your wall size
 Raffles, EtchingPrinted to your wall size
What tools and materials do I need?
You can remove wallpaper paste with a few basic household items. You will not need expensive or specialised equipment for most jobs. Before you begin, gather your supplies to make the process efficient and tidy.
What to check before you start
A little preparation before you begin the main task can save you significant time and prevent costly mistakes. Before mixing any solutions or starting to scrape, take a moment to assess the situation fully.
- Identify your wall type. Is it solid plaster or plasterboard? Plasterboard (also known as drywall) is more susceptible to damage from excessive water. If you are unsure, tap on the wall. A solid, low-pitched thud usually indicates plaster, while a hollow, drum-like sound suggests plasterboard. Adjust your technique to use less water on plasterboard.
- Test your removal solution. In a small, inconspicuous area, perhaps behind a door or near the floor, apply your chosen cleaning solution. This allows you to confirm it works on your specific paste without committing to the entire wall. It also gives you a feel for how long the paste needs to soften.
- Block out enough time. Removing wallpaper paste properly is a methodical process that should not be rushed. Check the size of your room and the initial test results to estimate the time required. An average-sized room can easily take a full afternoon. Rushing often leads to missed spots or a damaged wall surface.
- Two buckets: one for your cleaning solution and one for clean rinse water. Using two buckets is non-negotiable; it prevents you from reapplying diluted glue back onto the wall.
- Sponges or soft cloths. Large, absorbent decorator's sponges work best as they hold a good amount of water without dripping excessively.
- A spray bottle (optional, but helpful for evenly wetting the wall). This is particularly useful for controlling the amount of water applied to more sensitive plasterboard walls.
- Plastic scraper or plastic putty knife. Metal tools can easily dig into the wall surface, creating gouges that will need to be filled and sanded later. A flexible plastic blade is firm enough to lift the paste but gentle on the wall.
- Drop cloths or plastic sheeting to protect your floors. Canvas drop cloths are heavier and less slippery than plastic sheeting when wet.
- Rubber gloves to protect your hands.
- Your chosen cleaning solution: warm water, washing up liquid, white vinegar, or a commercial wallpaper remover.
How do you get wallpaper paste off walls with household items?
The most common and effective methods for removing wallpaper paste use simple, inexpensive ingredients you likely already have. This step by step process works for both a water and soap solution and a water and vinegar solution. Patience is key; let the solution do the work of softening the paste.
A worked example: Removing paste from a feature wall
Let's imagine you are clearing a feature wall.
- Preparation: You lay a canvas drop cloth along the base of the wall. After switching off the power, you cover the two electrical sockets with painter's tape.
- Solution: You mix your solution in a bucket, using warm water and a generous splash of white vinegar. You fill a second bucket with clean, cool water for rinsing.
- Application: You decide to work in small, manageable sections. Starting in the top left corner, you use a large sponge to apply the vinegar solution, ensuring the surface is evenly damp but not dripping. You let the solution soak for several minutes.
- Removal: After several minutes, you test the corner with your finger. It feels slick and gelatinous. Holding a plastic scraper at a low angle to the wall, you use a gentle, pushing motion to lift the softened paste. It comes away in a satisfying, gummy sheet. You wipe the gunk from your scraper onto an old rag.
- Rinsing: Using a clean sponge from your rinse bucket, you wipe down the section to remove any last traces of vinegar and paste. You then move to the next section to the right, repeating the process until the entire wall is clean.
Common mistakes and how to fix them
- Mistake: Not waiting long enough for the solution to work. If the paste is difficult to scrape and comes off in dry, flaky bits, it has not softened enough. The fix: Be patient. Re-apply your warm water solution to the area and wait for several minutes. The goal is for the paste to become slimy, not just damp.
- Mistake: Working on too large an area at once. If you wet half the wall, the paste at your starting point will have re-dried by the time you get to it, wasting time and effort. The fix: Stick to a manageable section size. Complete the soak, scrape, and rinse cycle on that one section before moving on.
- Mistake: Using dirty rinse water. If you keep dipping your sponge back into murky water, you are essentially wiping a thin layer of glue back onto the wall, which will cause adhesion problems later. The fix: Change your rinse water as soon as it becomes cloudy. For a large wall, you may need to change it several times.
- Protect your room. Lay drop cloths on the floor and cover any nearby furniture. Turn off the electricity to the room at the consumer unit and cover electrical sockets and switches with painter's tape.
- Mix your solution. Fill a bucket with warm water. Add a few drops of washing up liquid or a generous splash of white vinegar. Stir the mixture well.
- Apply the solution. Working in small, manageable sections, apply the solution to the wall with a sponge or spray bottle. Do not drench the wall; apply just enough to wet the surface thoroughly.
- Let it soak. Wait for several minutes. This gives the warm water time to reactivate and soften the old paste, making it much easier to remove.
- Scrape and wipe. Gently scrape the softened paste off with your plastic scraper. The paste should come off in a gummy or slimy layer. Wipe the residue off the scraper and the wall with a sponge.
- Rinse the wall. Using your second bucket with clean water, wipe down the section you just cleaned with a fresh sponge. This removes any lingering paste and cleaning solution.
- Check your work and dry. Run your hand over the area to feel for any remaining sticky spots. Once the entire wall is clean, let it air dry completely.
What is the best way to get wallpaper paste off walls?
The best method depends on the age and stubbornness of the paste. For most modern wallpapers, a simple solution of warm water and soap is sufficient. Older, tougher adhesives may require something stronger. Comparing your options can help you decide where to start.
| Method | Best For | Pros & Cons |
|---|---|---|
| Warm Water | Light, fresh paste residue. |
Pro: Cost-effective. Involves no cost and no chemicals, making it the safest first option. Con: Least effective. May not be powerful enough for old or very thick layers of paste. |
| Water & Vinegar/Soap | Most common wallpaper pastes. |
Pro: Highly effective. The acidic vinegar or detergent helps break down the adhesive quickly. Con: Odour. The vinegar smell can be strong but dissipates as it dries. |
| Commercial Remover | Old, stubborn, or heavy-duty paste. |
Pro: Powerful formula. Specifically designed with enzymes to dissolve tough adhesives efficiently. Con: Cost and chemicals. More expensive and requires good ventilation during use. |
Regardless of the method, the goal is a perfectly clean surface. This is non-negotiable for modern wall coverings. Casavono murals, for example, are made to measure and delivered in numbered panels that hang edge to edge. Any texture from old glue underneath could disrupt the continuous image and the perfect alignment of a detailed design like the Manhattan, Ink cityscape.
Ready to plan your next project?
Calculate the mural size for any wall in seconds.
How to clean wallpaper paste off a wall that has been painted over?
Discovering that a previous owner has painted directly over wallpaper paste is a frustrating situation. This creates a sealed, uneven layer that is very difficult to remove. Water-based solutions cannot penetrate the paint to soften the glue underneath, so you will need a more aggressive approach.
Your best option is to sand the wall. Use a medium grit sandpaper to abrade the surface and remove the high spots caused by the entombed glue. Your goal is to create a smooth, uniform surface. After sanding, wipe the wall down to remove all dust. You may need to apply a skim coat of joint compound to fully level the wall before priming.
This is a major reason why experts advise against painting over wallpaper or its residue. For more on this topic, see our detailed guide on whether you can you paint over wallpaper. Trying to cover up problems almost always creates more work later.
How to take wallpaper paste off walls without damaging the plaster?
The key to protecting your walls, whether they are plaster or plasterboard, is to avoid two things: excessive moisture and aggressive scraping. Over-saturating a wall can cause the surface of the plasterboard to degrade or can weaken older lime plaster. Working in small, controlled sections helps prevent this.
Always use a plastic scraper. A metal scraper has sharp edges that can easily gouge, scratch, or chip the wall surface, creating more repair work. A flexible plastic scraper has enough of an edge to lift the soft paste but is too soft to damage the plaster underneath. Hold it at a low angle and use gentle, steady pressure.
A note on timing. Do not let the cleaning solution dry on the wall. If it dries, the paste will simply harden again. If you get interrupted, re-wet the section before you resume scraping.
This careful approach is essential for a pristine final result. A smooth wall ensures that every detail of a new mural, from the subtle texture of a design like Miyabi, Linen to the bold lines of Raffles, Etching, is displayed perfectly.
What to do when wallpaper paste will not come off
Sometimes, particularly in older properties, you may encounter wallpaper paste that refuses to soften with water, vinegar, or soap. This is often due to very old types of adhesive, such as clay-based or wheat paste, which can become incredibly hard over decades. If you have followed the standard steps and the paste remains solid, you have a few options.
First, try a commercial wallpaper remover. These products contain enzymes specifically designed to break down the starches in old adhesives. They are often available as a liquid concentrate or a gel. A gel formula can be particularly effective as it clings to the wall for longer, giving the enzymes more time to work without drying out.
If a chemical remover is still not effective, your next option is a wallpaper steamer. While typically used for stripping paper, a steamer is excellent at using hot vapour to soften stubborn glue.
Use it carefully, holding the steam plate against a section for a short time before attempting to scrape. Work in small areas and avoid concentrating the steam in one spot for too long, as the combination of heat and moisture can damage the underlying plasterboard or plaster surface.
As a final resort for a surface that is uneven and impossible to clean completely, the best solution is to create a new surface. After scraping off as much paste as possible, sand the entire wall with medium-grit sandpaper to scuff the surface and knock down any high spots.
Wipe away all the dust, then apply a sealing primer. Once the primer is dry, you can apply a thin skim coat of joint compound or plaster over the entire wall to create a perfectly smooth, fresh canvas. This is a more labour-intensive job but guarantees a flawless base for your new paint or wallpaper.
What comes next? Preparing the wall for a new look
Once all the glue is gone and the wall is completely dry, you are ready for the final preparation stage. Inspect the entire surface in good light for any imperfections you may have missed. Look for small holes, cracks, or gouges from the removal process.
Fill any damage with a suitable filler, allow it to dry, and then sand it smooth so it is flush with the wall. The final step before any new finish is to apply a coat of good quality primer. A primer seals the repaired surface and provides an ideal, uniform base for either paint or new wallpaper adhesive to bond to.
With your wall now perfectly smooth, clean, and primed, it is a blank canvas for your next design project. This is the moment to explore a new aesthetic, whether it is a calming botanical or a vibrant pattern. Explore our full collection of made to measure wall murals to find a style that transforms your space.
More murals to consider
 Kowloon, ClayPrinted to your wall size
 Bramley, ClaretPrinted to your wall size
 Manhattan, InkPrinted to your wall size
Common questions
Can I paint over wallpaper glue?
No, you should never paint over wallpaper glue. The paint will not adhere properly and is likely to crack, bubble, or peel over time. The glue also creates an uneven texture that will be visible through the new paint, resulting in a poor quality finish.
How long does it take to remove wallpaper paste?
The time it takes depends on the size of the room and the stubbornness of the paste. For an average sized room with moderate residue, you should budget at least half a day. Older, thicker paste may require more soaking time and effort, potentially taking a full day.
Can I use a wallpaper steamer for just the glue?
Yes, a steamer can be effective at softening stubborn glue. However, it is often more than is necessary and carries a risk of damaging the underlying plasterboard or plaster if you apply too much heat and steam in one spot. Always try hot water first.
Does sugar soap remove wallpaper paste?
Yes, sugar soap is a strong cleaning agent that can be very effective at dissolving wallpaper paste. Mix it with warm water according to the manufacturer's directions and apply it using the same method of soaking, scraping, and rinsing with clean water.
How long should I wait before painting or wallpapering?
After you have washed and rinsed the walls, you must let them dry completely before applying primer, paint, or new wallpaper. Applying anything to a damp wall can lead to adhesion failure, mould, and bubbling.
Made to your measure
Murals for the wall you have in mind


Before you order