
Installation
How to Apply Peel and Stick Wallpaper: A Simple Guide
Applying peel and stick wallpaper is a straightforward project for a flawless feature wall. This guide covers everything from wall preparation to trimming for a professional result.

The short version
- Prepare your wall: it must be clean, smooth, and dry before you begin.
- Measure your wall and your first wallpaper panel carefully to ensure a straight start.
- Peel only the top few inches of the backing paper to position the panel correctly.
- Smooth the wallpaper from the centre outwards using a squeegee to remove air bubbles.
- Trim any excess paper at the end with a sharp utility knife for clean edges.
To apply peel and stick wallpaper, start with a clean, smooth wall. Hang the first panel against a plumb line, peeling back the top of the liner. Smooth it down from the centre outwards. Align subsequent panels edge to edge, matching the pattern, and trim the excess once all panels are hung.
What tools do I need for peel and stick wallpaper installation?
The right tools make peel and stick wallpaper installation much easier. You likely have many of these items at home already. Unlike traditional papers, you will not need paste, brushes, or water trays. The key items are for measuring, cutting, and smoothing.
Here is a complete list of what you should gather before you start:
- Tape measure
- Pencil
- Spirit level or laser level
- Squeegee or smoothing tool
- Utility knife with several fresh blades
- Step ladder
- Damp sponge or cloth
A squeegee is the most important tool for a bubble-free finish. It allows you to apply firm, even pressure across the surface of the paper, pushing air out to the edges. A sharp blade in your utility knife is just as crucial for clean, professional-looking cuts around sockets and along baseboards.
How do I prepare my walls for peel and stick wallpaper?
Proper wall preparation is the single most important step for a lasting finish. Peel and stick wallpaper requires a smooth, clean, and dry surface to adhere correctly. Any dust, grease, or texture on the wall can prevent the adhesive from bonding properly.
First, clean the wall with a mild soap and water solution to remove any grime, then allow it to dry completely for at least 24 hours. Fill any holes or cracks with filler, then sand them smooth once dry. If you have recently painted, you must wait at least three to four weeks for the paint to fully cure before applying wallpaper.
For a complete checklist and instructions on dealing with different wall conditions, our guide on how to prepare a wall for wallpaper offers more detailed advice. Taking the time to prepare your surface ensures your new wallpaper looks its best and stays put.
Murals made to your measure
 Wetherby, LinenPrinted to your wall size
 Sundown, HeatherPrinted to your wall size
 Belleville, InkPrinted to your wall size
What is the best way to apply peel and stick wallpaper?
The best way to apply peel and stick wallpaper is to work methodically, one panel at a time, from top to bottom. This systematic approach, often called the 'hang and smooth' method, minimises wrinkles and air bubbles. Always start on the left side of your wall and work towards the right.
Follow this step by step process for a perfect result.
Step 1: Measure your wall and plan your layout
Begin by measuring the total width and height of your wall at its widest and tallest points. It is good practice to add about 4 inches (10 cm) to both measurements for trimming. If using a Casavono made to measure mural, these exact dimensions are all you need to order, as the mural arrives in numbered panels that fit your wall.
For standard rolls, you will need to calculate how many you need. Our guide to measuring for wallpaper can help you with the calculations. Lay your panels out on the floor in hanging order to check the pattern match before you begin.
Step 2: Draw a vertical guide line
Never assume your walls or ceiling are perfectly straight. To ensure your first panel hangs correctly, you must create a plumb line. Measure out from the left corner of your wall a distance equal to the width of your wallpaper panel minus 1 inch (about 2.5 cm). For a Casavono panel that is 30 inches (76 cm) wide, you would measure 29 inches (73.5 cm).
At that point, use a spirit level and a pencil to draw a faint, perfectly vertical line from the ceiling to the floor. You will align the right edge of your first wallpaper panel with this line. This ensures the entire installation remains straight, even if your room is not.
Step 3: Hang the first panel
Carefully peel back about 12 inches (30 cm) of the backing paper from the top of your first panel. Do not remove the entire backing at once, as this can cause the adhesive side to stick to itself. Align the top edge of the wallpaper with the ceiling, allowing a small amount of excess (about 2 inches or 5 cm) for trimming later.
Position the right edge of the panel against the vertical pencil line you drew. Once you are happy with the placement, gently press the exposed adhesive section onto the wall. Casavono's Peel & Stick wallpaper is repositionable for up to 24 hours, giving you time to get this first panel just right.
Step 4: Smooth out air bubbles
With the top of the panel secured, continue to pull the backing paper down in small sections. As you expose more of the adhesive, use your squeegee to smooth the wallpaper onto the wall. Work from the centre of the panel outwards to the edges, using diagonal strokes.
This technique pushes any trapped air towards the sides, preventing bubbles from forming. If a large bubble appears, gently lift the wallpaper back to that point and re-apply it, smoothing as you go. Take your time with this step for a flawless finish.
Step 5: Hang the remaining panels
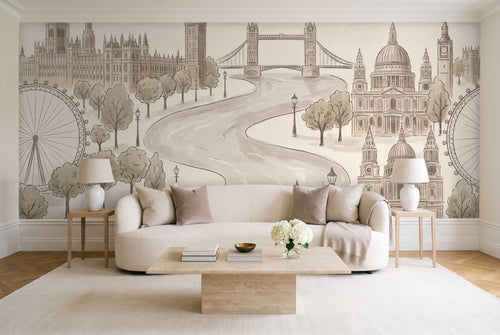
Take your second panel and align its left edge tightly against the right edge of the first panel. Focus on matching the pattern perfectly at eye level first. Casavono murals are hung edge to edge with no overlap, making pattern alignment for designs like the continuous cityscape of Belleville, Ink or the gentle landscape of Hatherleigh, Linen straightforward.
Once the pattern is aligned, repeat the process of peeling the backing and smoothing the panel from the centre outwards. Continue with all subsequent panels, ensuring each seam is tight and the pattern flows correctly across the wall.
Step 6: Trim the excess wallpaper
After all panels are hung and smoothed, it is time to trim the excess. Using a straight edge and a sharp utility knife, carefully cut along the ceiling line, the baseboard, and around any corners. The key to a clean cut is a fresh blade; change it frequently to avoid tearing the paper.
Pro Tip. For the sharpest cuts, press the back of the blade firmly against the wall and the straight edge. This angle prevents the paper from snagging and ensures a perfectly clean line every time.
See the full process for every paper
Our comprehensive guide covers installation for Peel & Stick, Pre-Pasted, and Non-Pasted papers.
How do I install wallpaper peel and stick around obstacles?
Installing peel and stick wallpaper around obstacles like light switches, electrical sockets, and windows requires careful cutting. Always turn off the electricity to the room at the circuit breaker before working around any electrical fittings. Then, remove the faceplates from switches and sockets.
Hang the wallpaper panel over the obstacle as you normally would. Gently press the paper against the wall around the edges of the fitting so its outline is visible. Use your utility knife to cut a small 'X' shape from corner to corner over the centre of the socket box.
You can then trim away the flaps, leaving a neat opening. A more detailed walkthrough is available in our guide on how to wallpaper around a window and other obstacles.
For windows and doors, hang the panel so it overlaps the frame. Make a diagonal relief cut from the corner of the paper to the corner of the frame to allow it to lie flat against the wall. Then, use a straight edge and your knife to trim the excess paper neatly along the edge of the frame.
Can I apply peel and stick wallpaper on any surface?
No, peel and stick wallpaper adheres best to smooth, non-porous surfaces. Walls with a satin or semi-gloss paint finish are ideal. Surfaces that are very porous, heavily textured, or exposed to high humidity can cause adhesion problems.
Applying wallpaper to textured walls is a common challenge. While a very light texture might be acceptable, heavy textures like popcorn or knockdown finishes will show through the paper and may prevent it from sticking properly. For more information, see our dedicated article on applying wallpaper to textured walls.
Here is a quick comparison of suitable and unsuitable surfaces for peel and stick wallpaper installation:
| Surface Type | Suitability | Reason |
|---|---|---|
| Satin or Semi-Gloss Paint | Ideal | Provides a smooth, non-porous surface for strong adhesion. |
| Matte or Flat Paint | Requires Primer | Porous finish can absorb adhesive, weakening the bond. |
| Freshly Painted Walls | Unsuitable | Paint needs 3 to 4 weeks to cure; off-gassing can cause bubbles. |
| Textured Walls | Not Recommended | Texture shows through and prevents a secure, bubble-free bond. |
| Bare Drywall or Plaster | Requires Primer | Unsealed surfaces are too porous and will absorb the adhesive. |
| Existing Wallpaper | Not Recommended | The weight can pull the old paper off the wall; texture may show. |
| Bathrooms | Not Recommended | High humidity can affect adhesion. Casavono's Pre-Pasted paper suits kitchens and bathrooms. |
How do I fix mistakes during installation?
Mistakes happen, but one of the main advantages of peel and stick wallpaper is that most are easy to fix. If you notice a bubble, a wrinkle, or a misaligned seam shortly after applying a panel, you can usually correct it without issue.
For a small bubble, try pushing it towards the nearest edge with your squeegee. If that does not work, you can prick it with a pin to release the air and then smooth it flat.
For larger issues like a crooked panel or a significant wrinkle, the best approach is to gently peel the panel off the wall and reapply it. Most peel and stick papers, including Casavono's, are repositionable for a period after initial application.
If a seam between two panels is not perfectly aligned, carefully lift the edge of the second panel and adjust its position until the pattern matches and the seam is tight. Work slowly to avoid stretching the material. Taking your time is the best way to avoid mistakes in the first place.
Is peel and stick wallpaper a good choice for renters?
Yes, peel and stick wallpaper is an excellent choice for renters who want to personalise their space without making permanent changes. Because it is designed to be self-adhesive and removable, it offers a damage-free way to create a stunning accent wall or decorate an entire room.
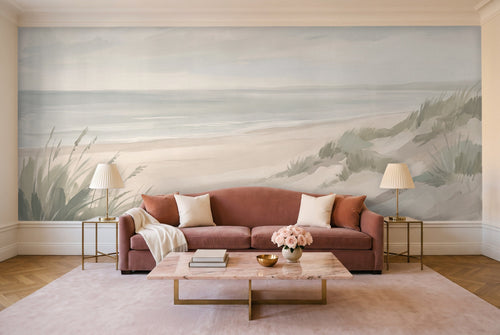
This makes it a perfect temporary design solution, allowing for bold choices like a serene Sundown, Heather mural in a bedroom or a playful pattern in a living area.
This renter-friendly quality also makes it ideal for children's rooms, nurseries, or anyone who enjoys changing their decor frequently. For more inspiration on temporary decor, explore our guide to removable wallpaper for renters.
How does a made to measure mural compare to standard wallpaper rolls?
While both can transform a room, a made to measure mural offers distinct advantages over standard wallpaper rolls, particularly in ease of installation and final appearance. The primary difference lies in how they are produced and planned for your specific wall.
A made to measure mural, like those from Casavono, is printed to the exact dimensions of your wall. This means the design is one continuous image, scaled perfectly for your space, such as the sprawling galaxy of the Firmament, Onyx mural.
It arrives in numbered, wide panels that are hung in order, eliminating the complex calculations for pattern repeats and dramatically reducing waste. You can learn more about how made to measure works on our site.
Standard wallpaper rolls come in a fixed size with a repeating pattern. This requires you to buy multiple rolls, calculate the pattern drop to ensure it aligns, and trim significant amounts of waste. The comparison below highlights the key differences.
| Feature | Made to Measure Mural | Standard Wallpaper Roll |
|---|---|---|
| Planning | Simple. Enter your wall dimensions; panels are pre-sized and numbered. | Complex. Requires calculating pattern repeat, drops, and number of rolls. |
| Design | Continuous image. One large-scale design that fits the wall perfectly. | Repeating pattern. A smaller design element repeated across the roll. |
| Waste | Minimal. Only a small amount of excess is trimmed from the edges. | Significant. Offcuts from matching the pattern repeat create substantial waste. |
| Installation | Straightforward. Hang numbered panels from left to right, edge to edge. | More difficult. Requires precise trimming and alignment for each drop. |
More murals to consider
 Hatherleigh, LinenPrinted to your wall size
 East River, MidnightPrinted to your wall size
 Firmament, OnyxPrinted to your wall size
Common questions
How long does peel and stick wallpaper last?
The lifespan of peel and stick wallpaper depends on several factors, including proper wall preparation and the room's environment. For a lasting finish, it is essential to apply it to a smooth, clean, and dry wall in a space with stable temperature and humidity.
Can I reuse peel and stick wallpaper?
Generally, peel and stick wallpaper is not designed to be reused. The adhesive may lose its tackiness after being removed, and the paper can stretch or tear during the removal process, making it difficult to reapply smoothly on another wall.
How do I clean peel and stick wallpaper?
Most peel and stick wallpapers can be gently cleaned by wiping them with a soft, damp cloth or sponge. Avoid using abrasive cleaners, harsh chemicals, or excessive water, as these can damage the surface or cause the edges to lift over time.
Will peel and stick wallpaper damage my walls?
Peel and stick wallpaper is a renter-friendly option designed to be removable. The best results are achieved when the wall surface is properly prepared and fully cured before application, as outlined in the installation guide.
Do I need to overlap peel and stick wallpaper?
This depends on the manufacturer. Casavono wall murals are designed to be installed with a tight butt seam, meaning the panels are hung edge to edge without any overlap. Always check the specific instructions provided with your wallpaper before you begin installation.
Made to your measure
Peel and Stick Wallpaper


Before you order