

Installation
How to Wallpaper a Ceiling for a Flawless Finish
Wallpapering a ceiling can transform a room, but it requires careful preparation and technique. This guide provides a complete step by step process for a beautiful, lasting finish.

The short version
- Thoroughly clean, repair, and prime the ceiling surface for the best adhesion and finish.
- Measure the ceiling's widest and tallest points, then find the centre line to plan a symmetrical layout.
- Work with a partner to hang panels one at a time, starting from the centre line and working outwards.
- Use a smoothing tool to eliminate all air bubbles, working from the centre of the panel to the edges.
- Trim the excess paper carefully with a sharp utility knife for clean, crisp edges against the walls.
Wallpapering a ceiling is a project that can dramatically change the feel of a room, adding character and depth. It requires a methodical approach, the right tools, and ideally a second person to help. With careful preparation and patience, you can achieve a professional and impressive result that looks seamless and intentional.
Can you wallpaper a ceiling?
Yes, you can absolutely wallpaper a ceiling. Often called the 'fifth wall', the ceiling is a large, uninterrupted surface that offers a fantastic opportunity for adding colour, pattern, or texture to a room. While it is more physically demanding than wallpapering walls due to working overhead against gravity, the process is fundamentally the same.
Treating the ceiling as a design feature can make a room feel more complete and considered. It can unify a design scheme or act as a bold, statement-making focal point. From a practical standpoint, modern wallpapers, including made-to-measure murals, are designed to adhere securely to properly prepared horizontal surfaces.
The key to success lies in meticulous preparation and having a clear plan before you begin. A smooth, clean, and primed surface is non-negotiable for ensuring the paper adheres correctly. With the right approach, any ceiling can be transformed.
Is the wallpaper on ceiling trend right for your room?
The wallpaper on ceiling trend is a versatile design choice that can work in almost any space, but its effect will vary depending on the room's size and the chosen design. Considering your room's specific characteristics will help you decide if it is the right move for your home.
In rooms with high ceilings, a dark or busy pattern can create a cosier, more intimate atmosphere, making the space feel less vast and more grounded. Conversely, in rooms with lower ceilings, a light-coloured wallpaper with a subtle pattern or a gentle sky-like mural can create an illusion of height and airiness. A quiet landscape such as the Wetherby, Linen mural can add texture without overwhelming the space.
This trend is particularly effective for defining a space within an open-plan layout, such as marking out the dining area or a cosy reading nook. It is also a popular choice for bedrooms and nurseries, where the ceiling is often in view while lying down.
Ultimately, it is a personal choice that depends on the style you wish to achieve. You can find inspiration across many styles in our full collection of wallpaper murals.
Murals made to your measure
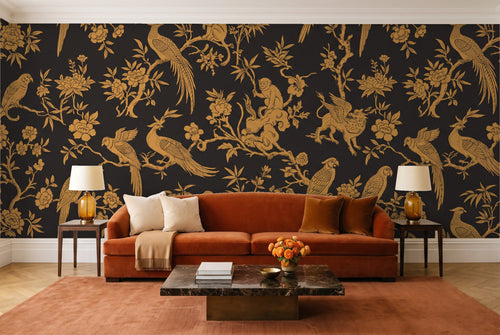
 Upper West, OatPrinted to your wall size
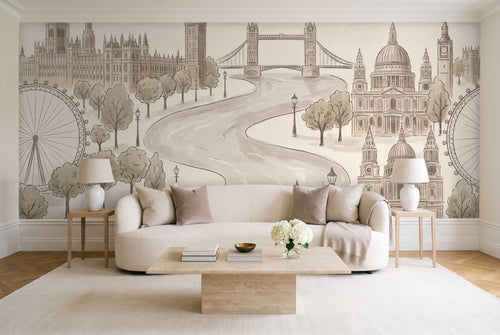
 Sundown, HeatherPrinted to your wall size
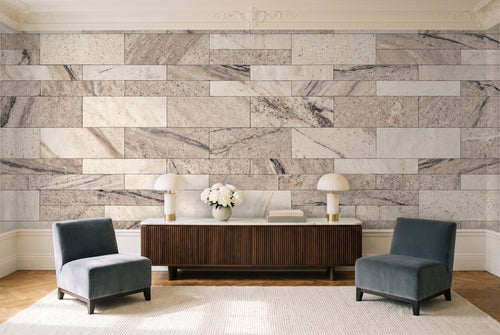
 Gesso, LochPrinted to your wall size
What you will need: Tools and materials
Gathering all your tools and materials before you start will make the installation process much smoother. Having everything within reach is especially important when you are working on a scaffold or ladder. Here is a comprehensive list of what you will need.
Essential Tools
- Sturdy platform: Two ladders with a scaffold plank between them is ideal, providing a stable surface to work along the length of a panel. A single stepladder can work but will require constant repositioning.
- Measuring tape and pencil: For accurate measurements and marking your guidelines.
- Spirit level or laser level: Crucial for establishing a perfectly straight starting line.
- Utility knife: With plenty of fresh, sharp blades for trimming. A dull blade will tear the paper.
- Smoothing tool: A specific wallpaper smoother is best for pushing out air bubbles without damaging the paper.
- Seam roller: To ensure the edges between panels are firmly adhered.
- Damp sponge and clean water: For wiping away any excess paste from the surface of the paper and your tools.
Materials by Paper Type
Depending on your chosen wallpaper, you will need a few specific items. Casavono offers three PVC-free paper types, each with slightly different requirements detailed in our wallpaper installation guide.
- For Non-Pasted paper: You will need a good quality wallpaper paste, a bucket for mixing, a pasting brush or roller, and a pasting table.
- For Pre-Pasted paper: You will need a water tray large enough to submerge a rolled panel, or a spray bottle or sponge to activate the adhesive.
- For Peel & Stick paper: No paste or water is required. A squeegee is often recommended instead of a standard smoothing tool for the best application.
How to prepare your ceiling for wallpaper
Proper preparation is the most critical factor for a successful wallpaper installation. A poorly prepared surface can lead to peeling, bubbling, and poor adhesion. The goal is a surface that is perfectly smooth, dry, clean, and structurally sound. For a complete overview, read our guide on how to prepare a wall for wallpaper.
Follow these steps for a perfect canvas:
- Turn off the power. Before doing anything else, turn off the electricity to the room at the circuit breaker. If you have any light fittings, you will need to remove them. It is always safest to have a qualified electrician handle any wiring.
- Clean the ceiling. Remove all dust, cobwebs, and grime using a sugar soap solution or a mild detergent. Rinse with a sponge and clean water, then allow the ceiling to dry completely.
- Remove old finishes. Scrape away any loose or flaking paint. If the ceiling is already wallpapered, you must remove the old paper completely. Never wallpaper over existing wallpaper.
- Fill and sand. Inspect the ceiling for any cracks, holes, or imperfections. Fill them with a suitable filler, allow it to dry, and then sand the repairs until they are perfectly smooth and flush with the surface.
- Prime the ceiling. Apply a coat of wallpaper primer or a primer/sealer. This step is essential. Priming seals the surface, prevents the paste from being absorbed too quickly, and provides a better grip for the wallpaper. It also makes future removal much easier. Let the primer cure for the manufacturer's recommended time.
How do you wallpaper a ceiling? A step by step guide
With your ceiling prepared and your tools ready, it is time to start hanging. This process requires precision and patience. Working with a partner is highly recommended; one person can support the paper while the other aligns and smooths it. This makes the entire process safer and more manageable.
Step 1: Measure your ceiling
First, measure the length and width of your ceiling at its widest points. When ordering a made-to-measure mural from Casavono, you should provide these exact dimensions. We then recommend adding about 4 inches (10 cm) to both the final width and height to account for any slight irregularities in your walls and ceiling.
This extra material, known as bleed, will be trimmed off at the end for a perfect fit. Use our free online wallpaper calculator to determine your needs.
Step 2: Plan your layout
Do not start in a corner. For a symmetrical and professional finish, you should start in the centre of the ceiling and work your way outwards. To find your starting point, measure the width of the ceiling and mark the halfway point at both ends. Snap a chalk line or draw a faint pencil line between these two points using a long spirit level. This is your central guideline.
Casavono murals are delivered in panels that are 30 inches (76 cm) wide, numbered for hanging order. Your first panel should be hung with one edge perfectly aligned with this central guideline. This ensures the design is centred in the room.
Step 3: Prepare your wallpaper panels
Lay out your panels on a clean, dry floor in the order they will be hung. For Non-Pasted wallpaper, apply an even layer of paste to the wall (or ceiling, in this case), covering an area slightly wider than one panel. For Pre-Pasted paper, activate the adhesive with water according to the instructions.
Pro Tip. To make a long panel more manageable, gently fold it back on itself in a concertina or accordion style, pasted side to pasted side. This stops it from drying out and makes it easier to carry up the ladder without it dangling and getting stuck.
Need more detail?
Our complete installation guide covers every step for all three paper types.
Step 4: Hang the first panel
Carefully take your first panel up to the ceiling. Unfold the top section and press it into place, aligning one edge perfectly with your central pencil line. Allow the extra 2 inches (5 cm) of bleed to run up the wall. Working from the centre of the panel outwards, use your smoothing tool to press the paper onto the ceiling, pushing out any air bubbles as you go.
Slowly unfold the next section of the panel and continue smoothing it into place. Continue this process until the entire panel is adhered to the ceiling, with the other end running slightly up the opposite wall.
Step 5: Hang subsequent panels
Take your second panel and align it with the first. Casavono murals are designed to be hung edge-to-edge, with no overlap. Carefully butt the edge of the second panel up against the first, ensuring the pattern matches perfectly. Smooth this panel down in the same way, from the centre outwards, paying close attention to the seam.
Use a seam roller to gently press the two edges together for a secure bond. Wipe away any paste that squeezes out with a damp sponge immediately. Repeat this process with the remaining panels on one side of the centre line, then complete the other side.
Step 6: Trim the excess
Once all panels are hung and the paste is still slightly damp, it is time to trim. Use a straight edge or the back of your smoothing tool to press the wallpaper firmly into the crease where the ceiling meets the wall.
Run a sharp utility knife along this crease to cut away the excess paper. Take your time to ensure a clean, straight cut. Do the same around any light fitting bases.
What are some good bedroom ceiling wallpaper ideas?
The bedroom is an ideal space for a statement ceiling, as it is a room where you spend time looking up. The right design can create a serene sanctuary or a dramatic, cocooning retreat. Your choice should reflect the atmosphere you want to create in your personal space.
For a calming effect. Consider designs that evoke the sky. A mural of soft clouds, a starry night, or a gentle gradient can be incredibly soothing. A sunset-inspired design like the Sundown, Heather mural can add a warm, peaceful glow to the room. Light colours and subtle patterns will make the ceiling feel higher and the room more spacious.
For a dramatic look. Dark, moody florals or deep, cosmic scenes can create a cosy and enveloping feel, perfect for a restful night's sleep. A charcoal cityscape like Belleville, Ink can add sophisticated, urban character. These bold choices work particularly well in bedrooms with higher ceilings, where they add drama without feeling oppressive. Explore our curated bedroom wall murals for more ideas.
Safety First. Always turn off the power supply at the mains before working around ceiling lights. It is safest to have a qualified electrician disconnect and reconnect any fittings for you.
Which type of wallpaper is best for a ceiling?
The best type of wallpaper for a ceiling depends on your DIY confidence level and the specific conditions of the room. Each of Casavono's three paper types has advantages and disadvantages when working overhead. For more information on materials, see our complete guide to wallpaper types.
| Paper Type | Pros for a Ceiling | Cons for a Ceiling |
|---|---|---|
| Non-Pasted | Most adjustable. Allows for more 'slip' and repositioning time, which is very helpful when aligning long panels overhead. | Messiest application. Applying paste to the ceiling can be drippy and requires careful covering of floors and furniture. |
| Pre-Pasted | Cleaner than non-pasted. No mixing or applying paste to the ceiling; simply activate with water. | Shorter working time. The adhesive begins to dry once activated, giving you less time for adjustments than with traditional paste. |
| Peel & Stick | Cleanest application. No paste or water needed, making it the least messy option by far. | Least forgiving. The adhesive is tacky and can be difficult to reposition overhead. The weight of the panel can make it hard to handle. |
For most people, especially first-timers, Non-Pasted paper is often the best choice for a ceiling. The ability to slide the panel into its final position is a significant advantage when you are working in an awkward position on a ladder. The 'paste the wall' method means you are not trying to handle a heavy, pasted sheet of paper.
What are some other accent ceiling ideas?
While wallpaper offers limitless design possibilities, it is not the only way to create an accent ceiling. Exploring other options can help you confirm that a mural is the right choice for your vision and budget. These ideas can also be combined with wallpaper for a unique look.
Paint. The simplest and most common approach is to paint the ceiling in a contrasting colour. A dark ceiling can feel dramatic and cosy, while a bright, unexpected colour can add a playful touch. You can also paint patterns using stencils or tape for a custom design.
Architectural details. Adding elements like wooden beams, coffers, or intricate mouldings can bring texture and classic character to a ceiling. Tin tiles are another popular choice, offering vintage charm and a wide array of patterns. These options, however, are often more costly and require more complex installation.
Compared to these alternatives, a made-to-measure wallpaper mural provides a unique advantage: the ability to display one large, continuous image across the entire surface. This allows for unparalleled creativity, from abstract art to realistic landscapes. A bold abstract design like Gesso, Loch can turn your ceiling into a true work of art, a feat that is difficult to achieve with other materials.
More murals to consider
 Belleville, InkPrinted to your wall size
 Coral Charm, PosyPrinted to your wall size
 Wetherby, LinenPrinted to your wall size
Common questions
Do you wallpaper a ceiling lengthways or widthways?
The direction depends on the room's shape and the wallpaper pattern. Generally, it is best to hang panels parallel to the main source of natural light, so any minor imperfections at the seams are less visible. For a long, narrow room, hanging them along the length can also feel more natural.
Is it harder to wallpaper a ceiling than a wall?
Yes, it is physically more challenging. You will be working overhead against gravity, which can be tiring on your neck and shoulders. The process requires more careful handling of the panels to prevent stretching or tearing. This is why working with a partner is strongly recommended for safety and a better result.
Can I use peel and stick wallpaper on a ceiling?
You can, but it presents unique challenges. Peel and stick wallpaper is heavier than other types, and its self-adhesive backing can be difficult to manage and reposition while on a ladder. Non-pasted wallpaper, which allows for more adjustment time, is often an easier choice for ceilings.
How many people does it take to wallpaper a ceiling?
This is a two-person job. One person should support the weight of the folded wallpaper panel and feed it to the other person, who is responsible for aligning it with the guideline and smoothing it onto the ceiling. Attempting this alone is unsafe and likely to result in a poor finish.
What's the best way to avoid air bubbles on a ceiling?
Start with a properly primed, smooth surface. When hanging, work methodically from the centre of the panel outwards towards the edges. Use a wallpaper smoothing tool with firm, even strokes to push all trapped air out. If a bubble persists, you can prick it with a pin and smooth it down.
Made to your measure
Murals for the wall you have in mind


Before you order