
Installation
How to Paste the Wall Wallpaper: Explained Simply
Understanding how to paste the wall wallpaper is key to a smooth installation. This guide explains the method, tools, and preparation needed for a perfect finish.

The short version
- Paste the wall wallpaper means applying adhesive directly to the wall, not the paper.
- This method makes wallpapering generally cleaner and quicker than pasting the paper.
- Casavono’s Non-Pasted murals use this technique, offering a durable, smooth matte finish.
- Proper wall preparation and precise measuring are crucial for a professional result.
- Tools include a spirit level, utility knife, smoothing tool, and the correct wallpaper paste.
Learning how to paste the wall wallpaper simplifies the installation process significantly, making it a popular choice for many. This method involves applying the adhesive directly to the wall before hanging each panel, leading to less mess and often quicker application compared to traditional paste the paper techniques.
What is Paste the Wall Wallpaper?
Paste the wall wallpaper refers to a modern wallpapering technique where the adhesive is applied directly onto the wall surface, rather than to the back of the wallpaper panel itself. This contrasts with the traditional paste the paper method, where the wallpaper panels are coated with paste and allowed to 'book' or soften before hanging.
The primary advantage of the paste the wall method is its efficiency and cleanliness. Since the paper does not need to be pasted or booked on a pasting table, the process is often faster and involves less mess. You simply apply the paste to the wall, then hang the dry wallpaper panel.
Casavono offers wall murals and wallpaper in a Non-Pasted paper type, which is specifically designed for this paste the wall method. This paper features a classic smooth matte finish and is our most durable option, printed to order in Europe.
All Casavono murals are made to measure, meaning each order is printed to the exact width and height you specify. This ensures a perfect fit for your wall, delivered in numbered panels, 30 inches (76 cm) wide, rolled in hanging order for a continuous image.
Why Choose Paste the Wall? Advantages and Disadvantages
Choosing the paste the wall method offers several benefits, particularly for those new to wallpapering or seeking a more streamlined process. However, it also comes with its own considerations that are important to understand before you begin your project.
The ease of handling dry wallpaper panels is often highlighted as a major advantage. This makes it simpler to manoeuvre and align panels on the wall, especially when working with large, intricate designs like a panoramic mural. Casavono murals, being made to measure, further enhance this precision, as the entire image is printed to your wall's exact dimensions.
| Feature | Advantage | Disadvantage |
|---|---|---|
| Application. | Less Mess. Applying paste directly to the wall keeps the workspace cleaner. | Requires Paste. You must purchase and mix a suitable wallpaper paste separately. |
| Handling. | Easier to Handle. Dry panels are lighter and less prone to tearing or creasing during installation. | Visibility. Paste on the wall can dry quickly, requiring swift panel placement. |
| Speed. | Quicker Installation. No need to wait for paper to soak, speeding up the hanging process. | Wall Condition. The wall must be perfectly prepared, as imperfections can show through. |
| Removal. | Generally Easier. Many paste the wall papers are designed to peel off in full strips when dry. | Adhesive Residue. Some paste residue may remain on the wall after removal, requiring cleaning. |
For a made to measure mural, the paste the wall method is particularly beneficial. Casavono murals are printed as one continuous image, delivered in numbered panels that hang from left to right, edge to edge, never overlapping. This precision printing combined with the paste the wall method ensures a stunning, expansive display.
Murals made to your measure
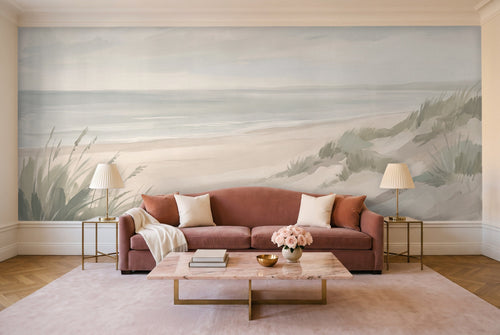
 Amberley, OchrePrinted to your wall size
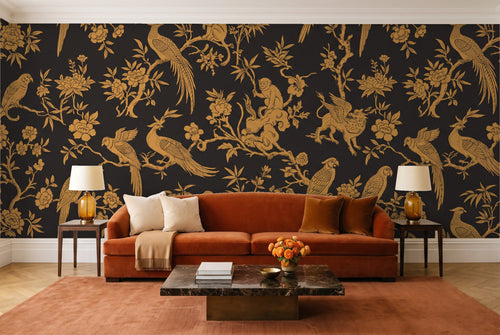
 Bramley, ClaretPrinted to your wall size
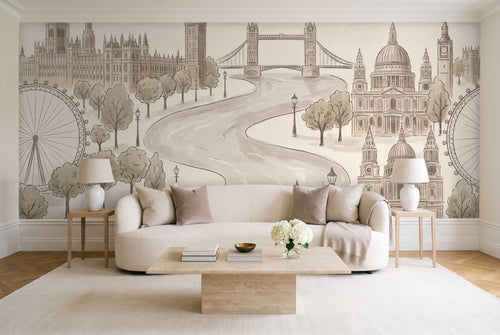
 Miyabi, LinenPrinted to your wall size
How to Prepare Your Wall for Paste the Wall Wallpaper
Proper wall preparation is the foundation for a flawless paste the wall wallpaper installation. Neglecting this crucial step can lead to issues such as visible imperfections, poor adhesion, or panels lifting over time. A well-prepared wall ensures your mural adheres beautifully.
Start by ensuring your wall is smooth, dry, and clean. Remove any old wallpaper or flaking paint. Fill any holes or cracks with appropriate filler, then sand these areas until they are perfectly smooth. Dust off the wall thoroughly after sanding.
If your wall has been freshly painted, it requires three to four weeks to cure completely before wallpapering. Painting too soon can lead to adhesion problems. For comprehensive guidance, consult our How to Prepare a Wall for Wallpaper guide.
Accurate measurement is also vital. Measure the full wall as one rectangle, including any doors or windows, at its widest and tallest points. Casavono recommends adding about 4 inches (10 cm) to both the width and height of your measurements. This excess will be trimmed after hanging, providing a buffer for uneven walls.
You can use our free wallpaper calculator to help determine the correct dimensions and panel count for your made to measure mural, ensuring you order precisely what you need.
Essential Tools for Hanging Paste the Wall Wallpaper
Having the right tools at hand makes the process of how to hang paste the wall wallpaper much smoother and more efficient. Gathering everything before you begin prevents interruptions and helps maintain a steady workflow. Quality tools contribute significantly to a professional finish.
You will need a tape measure and a pencil for accurate marking and measuring your wall and wallpaper panels. A spirit level is indispensable for drawing a plumb line, ensuring your first panel is perfectly straight. This sets the alignment for all subsequent panels.
A utility knife with fresh blades is essential for precise trimming of excess wallpaper at the ceiling, skirting boards, and around obstacles. Always use a fresh blade for each session to avoid tearing the paper. A smoothing tool, such as a wallpaper brush or plastic smoother, helps remove air bubbles and ensures firm adhesion.
For paste the wall application, you will also need a suitable wallpaper paste and a brush or roller to apply it evenly to the wall. A damp sponge is useful for wiping away any excess paste that might seep out from the seams, keeping your mural clean. Remember, Casavono offers a sample (30 x 20 in) of any design, which can be useful for testing your tools and technique.
Find Your Perfect Mural
Explore our extensive collection of made to measure wall murals and transform your space with ease.
Step by Step: How to Hang Paste the Wall Wallpaper
Learning how to hang paste the wall wallpaper is straightforward with a methodical approach. This guide covers the essential steps for a successful installation, ensuring your Casavono mural looks its best. Remember to work carefully and methodically for the best results.
Follow these steps to put up your paste the wall wallpaper:
-
Prepare the Wall and Mark Your First Line
Ensure your wall is prepared as described previously. Using your spirit level and pencil, draw a vertical plumb line from ceiling to floor, one panel width (30 inches or 76 cm) from your starting corner. This line will guide your first panel, ensuring it is perfectly straight.
-
Mix and Apply the Paste
Mix your wallpaper paste according to the manufacturer's instructions. Apply a generous, even layer of paste to the wall, slightly wider than one panel, from ceiling to floor, for your first panel. Ensure good coverage, especially at the edges.
-
Hang the First Panel
Take your first numbered Casavono panel. Align its right edge (if hanging left to right) with your plumb line, allowing a small overlap at the ceiling and skirting board for trimming. Gently press the panel onto the pasted wall, working from the top downwards and from the centre outwards.
For a detailed landscape like our Amberley, Ochre mural, careful alignment ensures the continuous image flows perfectly.
-
Smooth Out Bubbles and Trim
Using your smoothing tool, gently work out any air bubbles, pushing them towards the edges of the panel. Once smooth, use your utility knife and a straight edge to carefully trim the excess paper at the ceiling and skirting board. Wipe away any excess paste with a damp sponge.
-
Hang Subsequent Panels
Apply paste for the next panel. Take your second numbered Casavono panel and butt its edge tightly against the first panel, ensuring there are no gaps or overlaps. Casavono murals are designed to be hung edge to edge. Repeat the smoothing and trimming process.
When hanging a detailed botanical design such as Bramley, Claret, pay close attention to pattern matching at the seams to maintain the integrity of the design.
-
Finish and Clean Up
Continue this process for all panels, moving from left to right across your wall. Once all panels are hung, give the entire surface a final gentle wipe with a clean, damp sponge to remove any residual paste. For more detailed instructions on all Casavono paper types, refer to our comprehensive Wallpaper Installation: A Step by Step Professional Guide.
Common Mistakes and How to Avoid Them
Even with the paste the wall method, certain mistakes can occur during installation. Knowing these pitfalls in advance can help you achieve a professional finish for your Casavono wall mural. Careful attention to detail is key to a successful outcome.
One common mistake is insufficient wall preparation. Failing to clean, smooth, and prime your wall can lead to poor adhesion, visible bumps, or discolouration. Always ensure your wall is perfectly prepared and cured, as outlined in our preparation section.
Another frequent issue is applying too little or too much paste. Too little paste can cause edges to lift or bubbles to form, while too much can create a soggy mess and make the paper difficult to handle. Aim for an even, generous layer that covers the area slightly wider than your panel.
Incorrect panel alignment, especially with the first panel, can throw off the entire installation. Always use a spirit level to draw a plumb line for your initial panel. Remember, Casavono murals are made to measure, but precise hanging is still vital for a perfect fit.
Lastly, hurried trimming or using a dull blade can tear the wallpaper. Always use a sharp utility knife and take your time when trimming excess paper. While Casavono offers high-quality murals, please note that made to measure items cannot be returned for change of mind, so careful installation is important.
Comparing Paste the Wall, Pre-Pasted, and Peel & Stick
While this article focuses on how to wallpaper with paste the wall, it is helpful to understand the other installation methods available. Casavono offers three distinct paper types, each designed for different preferences and applications. Knowing the differences helps you choose the best option for your project.
The paste the wall method uses our Non-Pasted paper, which is known for its durability and classic smooth matte finish. It is ideal for those seeking a permanent, high-quality installation and who are comfortable with applying paste.
Casavono also offers Pre-Pasted paper and Peel & Stick paper. Pre-Pasted paper has adhesive already applied to its back, which is activated by water. This textured matte finish is robust and suits kitchens, bathrooms, and areas with everyday humidity.
Peel & Stick paper is a self-adhesive option that requires no paste or water. It is repositionable for up to 24 hours, making it renter-friendly and ideal for temporary installations or those who prefer maximum ease of application. Each paper type delivers the same high-quality, made to measure design.
| Paper Type | Adhesive Method | Key Features | Best Suited For |
|---|---|---|---|
| Non-Pasted. | Paste the Wall. Adhesive applied directly to the wall. | Durable. Smooth matte finish, most robust paper. | Long-term installations, high-traffic areas. |
| Pre-Pasted. | Water Activated. Adhesive on paper activated by water. | Textured. Matte finish, humidity resistant. | Kitchens, bathrooms, everyday humidity. |
| Peel & Stick. | Self-Adhesive. No paste or water needed. | Repositionable. Easy to apply and remove within 24 hours. | Renters, temporary decor, DIY beginners. |
All Casavono papers are PVC-free and certified, ensuring a high-quality product. To explore the self-adhesive option further, you can browse our collection of Peel and Stick Wallpaper designs.
Wall Curing. Always allow freshly painted walls to cure for three to four weeks before wallpapering to prevent adhesion issues.
More murals to consider
 Washi, TerracottaPrinted to your wall size
 Dawn Chorus, GardenPrinted to your wall size
 Cartographer, SlatePrinted to your wall size
Common Questions
What is the main difference between paste the wall and paste the paper?
The main difference lies in where the adhesive is applied. With paste the wall, you apply paste directly to the wall. With paste the paper, you apply paste to the back of the wallpaper panel itself, which then needs time to soften before hanging.
Is paste the wall wallpaper easier to hang?
Many find paste the wall wallpaper easier to hang because the panels remain dry and stable, making them lighter and simpler to manoeuvre on the pasted wall. This often results in less mess and a quicker overall installation process for most DIYers.
Do I need special paste for paste the wall wallpaper?
Yes, you will need a high-quality, ready-mixed wallpaper paste suitable for non-woven or heavy-duty wallpapers. Always check the paste manufacturer's instructions to ensure it is compatible with paste the wall papers for optimal adhesion and durability.
Can I hang paste the wall wallpaper on any surface?
Paste the wall wallpaper requires a smooth, clean, dry, and properly prepared surface for best results. It is essential to remove old wallpaper, fill holes, sand imperfections, and ensure freshly painted walls have fully cured for three to four weeks before installation.
What if I make a mistake while hanging paste the wall wallpaper?
If you encounter a mistake, such as a bubble or misalignment, you can often gently lift and reposition the panel on the wet paste. Work quickly before the paste dries. For excess paste, wipe immediately with a damp sponge to prevent it from drying on the mural surface.
Made to your measure
Murals for the wall you have in mind


Before you order