

Installation
How to Wallpaper a Corner Without a Visible Seam
Turning a corner is a key moment in any wallpapering project. Follow our professional method for both internal and external corners to achieve a clean, invisible seam every time.

The short version
- For internal corners, cut the paper so it wraps just 1/2 inch (1.3 cm) onto the next wall.
- For external corners, wrap the paper about 1 inch (2.5 cm) around the corner before making a final cut.
- Always use a spirit level to hang the next piece perfectly vertical on the new wall.
- Never hang a full, uncut width of wallpaper across a corner, as walls are rarely perfectly square.
- A sharp utility knife blade is essential for trimming excess paper neatly in the corner.
To wallpaper a corner, you must cut the paper. For an internal corner, wrap the panel just past the corner, then start the next panel plumb in the corner. For an external corner, wrap the panel around the corner, then overlap it with the next panel, cutting through both for a perfect join.
Why can't I just fold wallpaper into a corner?
You should never fold a full, uncut sheet of wallpaper from one wall to the next. Walls are almost never perfectly square or straight, even in new homes. Forcing a single piece of paper into a corner will cause creases, bubbles, and alignment issues.
When you turn the corner, the edge of the paper will no longer be perfectly vertical, or plumb. This means every subsequent panel you hang on the new wall will be crooked, and the pattern will drift downwards or upwards. The professional method involves cutting the paper to ensure you start fresh on the new wall with a true vertical line.
What tools do I need to wallpaper a corner?
You will need the same basic tools recommended in our main wallpaper installation guide, with special emphasis on a few key items. Precision is everything when tackling corners, so ensure your tools are clean and ready.
Your essential corner toolkit includes a tape measure, a pencil, a long spirit level, a wallpaper smoothing tool, and a sharp utility knife with plenty of fresh blades. You will also need a damp sponge to clean any adhesive from the wallpaper surface.
Depending on your paper. For Casavono's Non-Pasted paper, you'll need paste and a roller. For Pre-Pasted, a tray of water is required. For Peel & Stick, a squeegee is the best smoothing tool. A sharp blade is the most important tool of all; change your blade after every few cuts to avoid tearing the paper.
Murals made to your measure
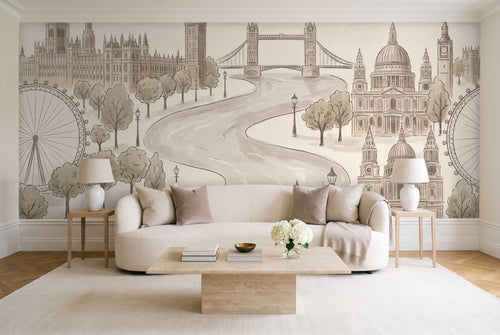
 Raffles, EtchingPrinted to your wall size
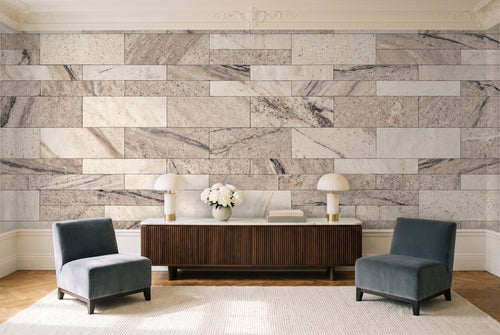
 Kowloon, ClayPrinted to your wall size
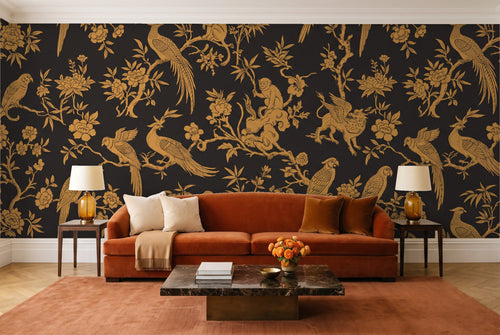
 Cathay, InkPrinted to your wall size
How do you wallpaper around internal corners?
An internal corner is where two walls meet, pointing into the room. This is the most common type of corner you will encounter. The method involves a small, neat overlap that becomes almost invisible in the natural shadow of the corner.
Step by step for an inside corner
- Measure and cut the first piece. Hang the wallpaper panel that leads into the corner. Measure the distance from the edge of this panel to the corner. Take this measurement at the top, middle, and bottom of the wall. Use the widest of these three measurements and add 1/2 inch (1.3 cm) for the wrap-around. Cut your panel lengthwise to this width.
- Hang the cut piece. Apply your adhesive (or wet the paper if Pre-Pasted) and hang this cut strip. Smooth it onto the first wall and into the corner, wrapping the extra 1/2 inch onto the second wall. Use your smoothing tool to press it firmly into the crease.
- Prepare for the next piece. You will use the leftover section of the panel you just cut (the offcut) to start on the new wall. Measure the width of this offcut. Now, on the new wall, measure this same distance out from the corner and make a small pencil mark.
- Draw a plumb line. Place your spirit level on the pencil mark and draw a perfectly vertical line from the ceiling to the floor. This plumb line is your guide for the edge of the next piece, ensuring it hangs perfectly straight.
- Hang the second piece. Hang the offcut, aligning its outer edge with your new plumb line. The other edge will slightly overlap the 1/2 inch of paper you wrapped around from the first wall. Smooth it down, especially at the overlap in the corner. Because the overlap is so small, it will be very discreet.
How do you wallpaper around external corners?
An external corner is one that juts out into the room, like the edge of a chimney breast. Here, any seam is more exposed, so the goal is a perfect butt joint where two edges meet without overlapping. This is achieved with a technique called a double cut.
Step by step for an outside corner
- Measure and wrap. Hang the panel approaching the corner, allowing it to wrap around the corner onto the next wall by about 1 inch (2.5 cm). Use your smoothing tool to ensure it adheres tightly to the corner's edge. Make small horizontal relief cuts at the ceiling and skirting board if needed to help the paper lie flat.
- Position the next panel. Take your next full panel and hang it on the new wall, overlapping the wrapped section from the previous panel. Take your time to align the pattern as closely as possible. Don't press down too firmly yet.
- Make the double cut. Place a steel straightedge or the edge of a wide smoothing tool over the centre of the overlap. Using a very sharp utility knife, cut vertically through both layers of wallpaper from top to bottom. Apply firm, steady pressure for a clean cut.
- Remove the excess strips. Carefully peel away the trimmed offcut from the top layer of wallpaper. Then, gently lift the edge of that top layer and pull away the underlying offcut strip from the wall.
- Create the perfect seam. Now, you can gently push the two fresh edges together. They should meet perfectly to form a nearly invisible seam. Use a seam roller or your smoothing tool to secure the join, and wipe away any excess adhesive with a damp sponge.
How to install peel and stick wallpaper in a corner?
The method for Peel and Stick wallpaper is fundamentally the same as for pasted papers, but the self-adhesive backing offers some advantages. Casavono's Peel & Stick is repositionable for up to 24 hours, giving you more freedom to get the placement just right.
For an internal corner, follow the wrap-and-overlap technique. Hang your first piece, wrapping 1/2 inch (1.3 cm) onto the next wall. Then, start the next piece by overlapping it in the corner, using a plumb line for vertical alignment. The thinness of the overlap is often even less noticeable with self-adhesive products.
For an external corner, the double-cut method remains the best practice. The key is to use a squeegee to smooth the paper down and a very sharp knife for the cut. The ability to gently lift and reposition the paper if the pattern is not quite aligned is a major benefit for achieving a perfect result.
Does a made to measure mural change how you wallpaper a corner?
The technique for wallpapering a corner remains the same, but planning is even more important with a wall mural. A mural is a single, continuous image, so maintaining the flow of the design across a corner is the primary goal.
This is a situation where a made to measure mural from Casavono is a distinct advantage. Because every mural is printed to your room's exact dimensions, the entire image is scaled to fit your wall perfectly. Our murals are delivered in numbered, 30-inch (76 cm) wide panels, so you can anticipate which panel will need to be cut at the corner.
A design with a non-repeating, organic texture like Washi, Terracotta is extremely forgiving of corner cuts. For a large-scale scenic mural, such as the elegant Cathay, Ink, the professional techniques described here will ensure the garden scene flows beautifully from one wall to the next. You can learn more about how ordering a made to measure mural works and plan your project with confidence.
Ready to Find Your Perfect Mural?
Explore our collection of designs, all made to measure for your walls.
What are the most common mistakes when wallpapering corners?
Avoiding a few common pitfalls can make the difference between a frustrating job and a professional-looking finish. The most frequent errors all relate to preparation and using the wrong techniques for the corner you are facing.
Being aware of these mistakes is the first step to avoiding them. The table below outlines the most common issues and how to ensure you get it right the first time.
| Mistake | Solution |
|---|---|
| Folding a full sheet. | This causes creases and throws the pattern off vertical. Always cut the paper at a corner and restart on the new wall with a plumb line. |
| Using a dull blade. | A blunt knife will tear or drag the wet paper, creating a ragged edge. Use a brand new blade for your corner cuts, especially the double cut. |
| Not using a spirit level. | Trusting the corner to be a true vertical guide is a mistake. Always draw a new plumb line for the first panel on a new wall. |
| Overlapping too much. | A large overlap on an internal corner creates a visible ridge. Keep the wrap-around to a maximum of 1/2 inch (1.3 cm). |
Pro Tip. For slightly imperfect internal corners, a thin bead of decorators caulk run down the seam after the wallpaper is fully dry can hide any minor gaps for a truly seamless finish.
How do you wallpaper a corner with a busy pattern?
A busy or large-scale pattern requires careful handling at corners to minimise visual disruption. The good news is that the standard professional methods are designed to make the join as discreet as possible, regardless of the pattern.
For an internal corner, the slight pattern break caused by the small overlap will be masked by the corner's shadow. The eye naturally focuses on the flat plane of the wall, not the crease. A complex, non-geometric design like a botanical mural is excellent at hiding these joins. The organic lines in a design such as Raffles, Etching make the corner transition feel natural.
For external corners. The double-cut technique is your best friend. It allows you to align the pattern almost perfectly before cutting, creating a butt joint that continues the design with minimal interruption. This is the best method for geometric, striped, or repeating patterns. You can use our free wallpaper calculator to visualise how a design will look at your wall's size and better anticipate where patterns will fall.
More murals to consider
 Bramley, ClaretPrinted to your wall size
 Marram, SagePrinted to your wall size
 Washi, TerracottaPrinted to your wall size
Common questions
How much should wallpaper wrap around a corner?
For an internal corner, the wallpaper should wrap onto the next wall by about 1/2 inch (1.3 cm). For an external corner, you should wrap it around by about 1 inch (2.5 cm) before making a final double cut through both layers to create a perfect, non-overlapping seam.
Can you use a single piece of wallpaper for two walls?
No, you should never hang a single, uncut piece of wallpaper across a corner from one wall to another. Walls are rarely perfectly square, and this method will cause creases, bubbles, and make the pattern run crooked on the second wall. Always cut the paper at the corner.
Is it better to start wallpapering in a corner?
It is usually better to start on a feature wall away from corners, often near the centre of the wall. This makes the most visible part of the room look perfect and pushes any slight pattern mismatches into less noticeable areas, such as the final corners of the room.
What is a plumb line and why is it important for corners?
A plumb line is a perfectly vertical line drawn on the wall using a spirit level. It is crucial when wallpapering after a corner because it provides a true vertical guide for your first panel on the new wall, ensuring the pattern does not slant or drift as you continue.
Do you overlap wallpaper in corners?
For internal corners, you create a tiny, deliberate overlap of about 1/2 inch (1.3 cm) which is pressed discreetly into the corner. For external corners, you temporarily overlap two sheets and then cut through both to create a perfect butt joint where the edges meet with no overlap.
How do you handle a corner that isn't a perfect 90 degrees?
The professional methods described work for non-standard corners too. The key is to treat each wall as a new surface. By wrapping the paper slightly and then starting the next piece with a new plumb line, you correct for any crookedness in the wall's angle itself.
Made to your measure
Murals for the wall you have in mind


Before you order